Hardware features
Introduction
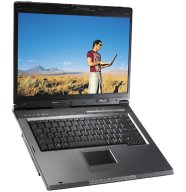
Here, you find a documentation about Linux on a ASUS A6J laptop and in particular a Asus A6JM-AP025H.

Hardware
| Processeur | Intel Core Duo T2400 Centrino Duo – 1,83 GHz |
| RAM | 2 Go DDR2 |
| Photo card reader | Ricoh Co Ltd R5C822 SD/SDIO/MMC/MS/MSPro Host Adapter |
| CD / DVD | MATSHITADVD-RAM UJ-841S, ATAPI CD/DVD-ROM drive |
| Hard drive | FUJITSU MHV2120AH PL, ATA DISK drive – 120 Go |
| IDE controler | Intel Corporation 82801G (ICH7 Family) IDE Controller |
| Video card | nVidia GeForce Go 7600 – 512 Mo |
| Sound card | Intel Corporation 82801G (ICH7 Family) High Definition Audio Controller |
| Netword card | Realtek Semiconductor Co., Ltd. RTL8111/8168B PCI Express Gigabit Ethernet controller |
| Wi-Fi | Intel Corporation PRO/Wireless 3945ABG Network Connection |
| PCMCIA | Ricoh Co Ltd RL5c476 II |
| Others | Webcam, Bluetooth, Modem, FireWire, Touchpad… |
PCI features
Below lspci output :
[root@Dahlia /root]$ lspci
00:00.0 Host bridge: Intel Corporation Mobile 945GM/PM/GMS/940GML and 945GT Express Memory Controller Hub (rev 03)
00:01.0 PCI bridge: Intel Corporation Mobile 945GM/PM/GMS/940GML and 945GT Express PCI Express Root Port (rev 03)
00:1b.0 Audio device: Intel Corporation 82801G (ICH7 Family) High Definition Audio Controller (rev 02)
00:1c.0 PCI bridge: Intel Corporation 82801G (ICH7 Family) PCI Express Port 1 (rev 02)
00:1c.3 PCI bridge: Intel Corporation 82801G (ICH7 Family) PCI Express Port 4 (rev 02)
00:1d.0 USB Controller: Intel Corporation 82801G (ICH7 Family) USB UHCI #1 (rev 02)
00:1d.1 USB Controller: Intel Corporation 82801G (ICH7 Family) USB UHCI #2 (rev 02)
00:1d.2 USB Controller: Intel Corporation 82801G (ICH7 Family) USB UHCI #3 (rev 02)
00:1d.3 USB Controller: Intel Corporation 82801G (ICH7 Family) USB UHCI #4 (rev 02)
00:1d.7 USB Controller: Intel Corporation 82801G (ICH7 Family) USB2 EHCI Controller (rev 02)
00:1e.0 PCI bridge: Intel Corporation 82801 Mobile PCI Bridge (rev e2)
00:1f.0 ISA bridge: Intel Corporation 82801GBM (ICH7-M) LPC Interface Bridge (rev 02)
00:1f.1 IDE interface: Intel Corporation 82801G (ICH7 Family) IDE Controller (rev 02)
01:00.0 VGA compatible controller: nVidia Corporation G70 [GeForce Go 7600] (rev a1)
02:00.0 Ethernet controller: Realtek Semiconductor Co., Ltd. RTL8111/8168B PCI Express Gigabit Ethernet controller (rev 01)
03:00.0 Network controller: Intel Corporation PRO/Wireless 3945ABG Network Connection (rev 02)
04:01.0 CardBus bridge: Ricoh Co Ltd RL5c476 II (rev b3)
04:01.1 FireWire (IEEE 1394): Ricoh Co Ltd R5C552 IEEE 1394 Controller (rev 08)
04:01.2 Generic system peripheral [0805]: Ricoh Co Ltd R5C822 SD/SDIO/MMC/MS/MSPro Host Adapter (rev 17)
04:01.3 System peripheral: Ricoh Co Ltd R5C592 Memory Stick Bus Host Adapter (rev 08)
USB features
Below lsusb ouput :
[root@Dahlia /root]$ lsusb
Bus 005 Device 004: ID 174f:a311
Bus 005 Device 001: ID 0000:0000
Bus 003 Device 002: ID 0b05:1712 ASUSTek Computer, Inc.
Bus 003 Device 001: ID 0000:0000
Bus 002 Device 001: ID 0000:0000
Bus 001 Device 004: ID 046d:c047 Logitech, Inc.
Bus 001 Device 001: ID 0000:0000
Bus 004 Device 001: ID 0000:0000
Distribution installation
Debian unstable
I used to work with a Debian distribution, so I choose a Debian and in particular a Sid Debian (or unstable)
Normally, it should be exactly the same proceed with the others distributions.
At first, I use the first ISO of Debian testing. I install the minimal system, then I set the network to complet the install by network.
The first step is the definition of partitions. I keep the Windows partitions.
Sample below :
[root@Dahlia /root]$ fdisk -l /dev/hda
Disk /dev/hda: 120.0 GB, 120034123776 bytes
255 heads, 63 sectors/track, 14593 cylinders
Units = cylinders of 16065 * 512 = 8225280 bytes
Disk identifier: 0xd53d826f

Device     Boot  Start  End    Blocks       Id  System
/dev/hda1            1    128  1028128+     82  Linux swap / Solaris
/dev/hda2     *   1403   6501  40957717+     7  HPFS/NTFS
/dev/hda3          129   1402  10233405     83  Linux
/dev/hda4         6502  14593  64998990      5  Extended
/dev/hda5         6502  10391  31246393+    83  Linux
/dev/hda6        10392  11607  9767488+     83  Linux
/dev/hda7        11608  12336  5855661      83  Linux
/dev/hda8        12337  14281  15623181      c  W95 FAT32 (LBA)
/dev/hda9        14282  14593  2506108+     82  Linux swap / Solaris

Partition table entries are not in disk order
Mount points :
[root@Dahlia /root]$ mount
/dev/hda3 on / type reiserfs (rw,notail)
tmpfs on /lib/init/rw type tmpfs (rw,nosuid,mode=0755)
proc on /proc type proc (rw,noexec,nosuid,nodev)
sysfs on /sys type sysfs (rw,noexec,nosuid,nodev)
udev on /dev type tmpfs (rw,mode=0755)
tmpfs on /dev/shm type tmpfs (rw,nosuid,nodev)
devpts on /dev/pts type devpts (rw,noexec,nosuid,gid=5,mode=620)
fusectl on /sys/fs/fuse/connections type fusectl (rw)
usbfs on /proc/bus/usb type usbfs (rw)
/dev/hda5 on /home type reiserfs (rw)
/dev/hda6 on /usr type reiserfs (rw)
/dev/hda7 on /var type reiserfs (rw)
nfsd on /proc/fs/nfsd type nfsd (rw)
binfmt_misc on /proc/sys/fs/binfmt_misc type binfmt_misc (rw,noexec,nosuid,nodev)
After a complet install :
[root@Dahlia /root]$ df -h
Sys. de fich.  Tail.   Occ.   Disp.  %Occ.   Monté sur
/dev/hda3       9,8G   816M    9,0G     9%   /
tmpfs          1015M      0   1015M     0%   /lib/init/rw
udev             10M   132K    9,9M     2%   /dev
tmpfs          1015M      0   1015M     0%   /dev/shm
/dev/hda5        30G    22G    8,6G    72%   /home
/dev/hda6       9,4G   5,6G    3,8G    60%   /usr
/dev/hda7       5,6G   2,0G    3,7G    36%   /var
WARNING, if you wish use the hibernate mode… You’d rather set 4 or 5 Go to be quiet.
My packages list.
Kernel 2.6.22.1
I used to compile my kernel… to choose its features. You can download my “.config” file (in current optimisation…).
[root@Dahlia src]$ wget http://kernel.org/pub/linux/kernel/v2.6/linux-2.6.22.1.tar.bz2
[root@Dahlia src]$ tar -jxf linux-2.6.22.1.tar.bz2
[root@Dahlia src]$ ln -s linux-2.6.22.1 linux
[root@Dahlia src]$ cd linux
[root@Dahlia linux]$ cp ~/config.txt .config
[root@Dahlia linux]$ make bzImage
[root@Dahlia linux]$ make modules
[root@Dahlia linux]$ make modules_install
[root@Dahlia linux]$ cp arch/i386/boot/bzImage /boot/vmlinuz-2.6.22.1
[root@Dahlia linux]$ cp System.map /boot/System.map-2.6.22.1
[root@Dahlia linux]$ cd /boot
[root@Dahlia boot]$ mkinitrd -o initrd.img-2.6.22.1 /lib/modules/2.6.22.1
My bootloader is GRUB. You can download here my GRUB configuration.
[root@Dahlia /root]$ apt-get install grub
[root@Dahlia linux]$ grub-install /dev/hda
[root@Dahlia linux]$ cd /boot
[root@Dahlia /boot]$ tar -zxf grub.tar.gz
[root@Dahlia /boot]$ cd grub
{root@Dahlia grub]$ ./install
Of course, you have to adapt for your table partitions.
LAN network
To use the netword card, there isn’t problem. Indeed the kernels higher to 2.6.18 support our card.
I have blacklisted the module eth1394. In fact, I don’t need this network interface, and this interface is randomly eth1 or eth1. I use equally ifrename, to choose the name eth0 for my network interface.
[root@Dahlia /root]$ apt-get install ifrename
[root@Dahlia /root]$ ifconfig -a
eth0 	Lien encap:Ethernet HWaddr 00:17:31:DC:FD:16
  	UP BROADCAST RUNNING MULTICAST MTU:1500 Metric:1
  	RX packets:0 errors:0 dropped:0 overruns:0 frame:0
  	TX packets:2 errors:0 dropped:0 overruns:0 carrier:0
  	collisions:0 lg file transmission:1000
  	RX bytes:0 (0.0 b) TX bytes:684 (684.0 b)
  	Interruption:169 Adresse de base:0xc800

lo 	Lien encap:Boucle locale
  	inet adr:127.0.0.1 Masque:255.0.0.0
  	UP LOOPBACK RUNNING MTU:16436 Metric:1
  	RX packets:1040 errors:0 dropped:0 overruns:0 frame:0
  	TX packets:1040 errors:0 dropped:0 overruns:0 carrier:0
  	collisions:0 lg file transmission:0
  	RX bytes:97003 (94.7 KiB) TX bytes:97003 (94.7 KiB)
[root@Dahlia /root]$ echo "eth0 mac 00:17:31:DC:FD:16" > /etc/iftab
[root@Dahlia /root]$ echo "blacklist eth1394" >> /etc/modprobe.d/blacklist
Now you can configure your network card in ethX.
Video
I have chosen a laptop with a GeForce card, because this card are better supported by Linux than the ATI cards.
We install the driver and try the hardware acceleration.
Below, I compile the driver for the kernel current running.
[root@Dahlia /root]$ cd /usr/src
[root@Dahlia src]$ apt-get install linux-kernel-headers nvidia-kernel-common nvidia-kernel-source
[root@Dahlia src]$ export KVERS=`uname -r`
[root@Dahlia src]$ export KSRC=/usr/src/linux
[root@Dahlia src]$ tar xvzf nvidia-kernel-source.tar.gz
[root@Dahlia src]$ cd modules/nvidia-kernel
[root@Dahlia src]$ debian/rules binary_modules
[root@Dahlia src]$ cd ..
[root@Dahlia src]$ dpkg -i nvidia-kernel-*.deb
[root@Dahlia src]$ depmod -a
Now, we install and configure Xorg to use our driver.
[root@Dahlia src]$ apt-get install xserver-xorg nvidia-glx nvidia-glx-dev
Create the file /etc/modprobe.d/nvidia
[root@Dahlia src]$ cat /etc/modprobe.d/nvidia
alias /dev/nvidia* nvidia
alias char-major-195* nvidia
[root@Dahlia src]$ update-modules
[root@Dahlia src]$ dpkg-reconfigure xserver-xorg
Here my Xorg file configuration.
Audio
Your sound card should already be configured.
But, we increase this installation. In fact, I want use the Gnome sound daemon and ALSA for my applications. I have to mix the sound.
To install the sound card :
[root@Dahlia /root]$ alsaconf
Now, I set the mixer :
[root@Dahlia /root]$ cat /etc/asound.conf
pcm.card0 {
    type hw
    card 0
}

pcm.!default {
    type plug
    slave.pcm "dmixer"
}

pcm.dmixer {
    type dmix
    ipc_key 1025
    slave {
        pcm "hw:0,0"
        period_time 0
        period_size 1024
        buffer_size 4096
        periods 128
        rate 44100
    }
    bindings {
        0 0
        1 1
    }
}
This configuration permits to use the Gnome sound server and ALSA.
Multimedia keyboard
How do you use the “multi-media” keys under Linux ?
This is possible with the module asus_acpi from kernel. Moreover, you can choose the action for each button.
[root@Dahlia /root]$ echo "asus_acpi" >> /etc/modules
[root@Dahlia /root]$ modprobe asus_acpi
The application acpi4asus permits to manage the event for each key and button.
Download the application.
[root@Dahlia /root]$ cd /usr/local/src
[root@Dahlia src]$ tar -zxf acpi4asus-0.32.tar.bz2
[root@Dahlia src]$ cd acpi4asus-0.32/asus_acpid
[root@Dahlia asus_acpid]$ make all
[root@Dahlia asus_acpid]$ make install
Download my configuration files.
[root@Dahlia /root]$ tar -zxf asus_acpid.tar.gz
[root@Dahlia /root]$ cd .asus_acpid
[root@Dahlia .asus_acpid]$ asus_acpid
[root@Dahlia .asus_acpid]$ tail -f log
In this directory, you find a log file to know which key is pressed.
All keys are managed even “contrast”, “volume”, “brithness”…
Mouse / Touchpad
It isn’t very difficult. To use in the same time mouse and touchpad.
[root@Dahlia /root]$ cat /etc/gpm.conf
device=/dev/input/mice
responsiveness=
repeat_type=none
type=exps2
append=''
sample_rate=
Processor
For the processeur, you have to compile your kernel with the SMP support and the centrino support to be able to control the CPU frequency.
[root@Dahlia /root]$ cat /etc/modules
asus_acpi
speedstep-centrino
cpufreq_stats
cpufreq_userspace
cpufreq_powersave
cpufreq_ondemand
To allow an user to modify the CPU frequency :
[root@Dahlia /root]$ cat /etc/sudoers
login ALL = (root) NOPASSWD: /usr/sbin/cpufreqset [0-9]*
login ALL = (root) NOPASSWD: /usr/sbin/cpufreqsetgovernor [a-z]*
login ALL = (root) NOPASSWD: /usr/sbin/cpufreqnextgovernor
As far as I’m concerned, I use gkrellm to set the CPU frequency.
Serial port
I have bought an USB <-> serial adaptater to be able to used my old devices.
[root@Dahlia /root]$ modprobe usbserial
[root@Dahlia /root]$ modprobe pl2303
And I find the serial port /dev/ttyS0
DVD / Graveur
Nothing in particular for this device.
PCMCIA
Nothing in particular for this device.
WAN Network
To use wan device, you need compile a driver.
You need two applications :
Download the kernel module ipw3945
Download the application ipw3945d
[root@Dahlia /root]$ apt-get install firmware-ipw3945
[root@Dahlia /root]$ cd /usr/local/src
[root@Dahlia src]$ tar -zxf ipw3945d-1.7.22.gz
[root@Dahlia src]$ cp ipw3945d-1.7.22/x86/ipw3945d /usr/local/sbin
[root@Dahlia src]$ tar -zxf ipw3945-1.2.1.tgz
[root@Dahlia src]$ cd ipw3945-1.2.1
[root@Dahlia ipw3945-1.1.0]$ make
To enable or disable the device :
[root@Dahlia ipw3945-1.2.1]$./load -ipw3945d=/usr/local/sbin
[root@Dahlia ipw3945-1.2.1]$ ./unload -ipw3945d=/usr/local/sbin
Your device is ready.
Bluetooth
To use bluetooth, you have to enable the USB interface.
[root@Dahlia /root]$ modprobe bluetooth
[root@Dahlia /root]$ modprobe hci_usb
Irda
Todo
Firewire
To use this device, you have to load the good modules.
By sample, to use a video camera :
[root@Dahlia /root]$ modprobe ohci1394
[root@Dahlia /root]$ modprobe ieee1394
[root@Dahlia /root]$ modprobe raw1394
[root@Dahlia /root]$ modprobe dv1394
Photocard reader
No difficult to use the photocard reader, you haveto load the module sdhci.
[root@Dahlia /root]$ modprobe sdhci
[root@Dahlia /root]$ mkdir /mnt/sd
[root@Dahlia /root]$ mount /dev/mmcblk0p1 /mnt/sd
Modem
To do…
Webcam
Following the laptop, you can have an other webcam like me.
In my case, I have an USB 2.0 Syntek DC-1125 camera.
I have written a driver to support this webcam and others Syntek webcam.
[root@Dahlia /root]$ cd /usr/local/src
[root@Dahlia src]$ svn checkout https://syntekdriver.svn.sourceforge.net/svnroot/syntekdriver/trunk/driver stk11xx
[root@Dahlia src]$ cd stk11xx
[root@Dahlia stk11xx]$ make
[root@Dahlia stk11xx]$ modprobe videodev
[root@Dahlia stk11xx]$ insmod stk11xx.ko
DVI / VGA / TV / Casque / Micro
All these devices are supported by Linux.
Software installation
My applications
Below my applications :
| Desktop | Bureautique | Réseau | Développement | Multi-média |
| Gnome & Sawfish | OpenOffice | Mutt | Bluefish | Audacious |
| Gkrellm2 | Planer | Evoluton | Glade | Grip |
| graveman | Evince | Gaim | Anjuta | Kino |
| gtkam | Gnochm | GFTP | VIM | VLC |
| Dia | Epiphany | Xine | ||
| GQview | Ekiga | Mplayer | ||
| The Gimp | Pan | RealPlayer | ||
| X-Chat |
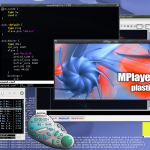
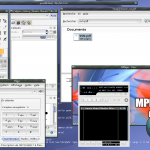
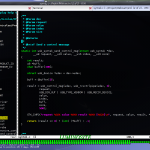
My desktop


2 Responses to Linux on ASUS A6JM laptop